One thing that people may or may not realize is that you can mount memory with EnCase and use Volatility directly against the mounted memory “file”. This can be
especially useful for checking your enterprise for infected machines in order to narrow your focus. This is a quick post on how to accomplish this.
Accessing RAM
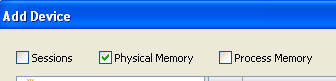
First you need to connect to the machines of interest, either using EnCase Enterprise (EE) or some kind of hybrid approach (OK, if you’re using the hybrid approach, you probably don’t even need EnCase, unless you are using EnScripts or keyword searching etc). For EE, make sure that you click the “Physical Memory” checkbox before connecting to each of the machines.
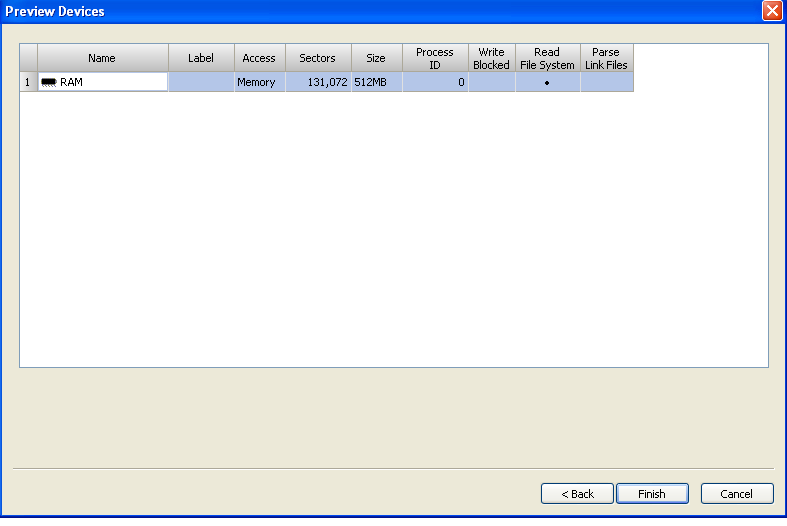
At this point, you should have a list of all the items available from those machines that you can pull back (RAM and Disks). You can choose the items that you want to preview. Below you can see that I have selected one machine’s RAM:
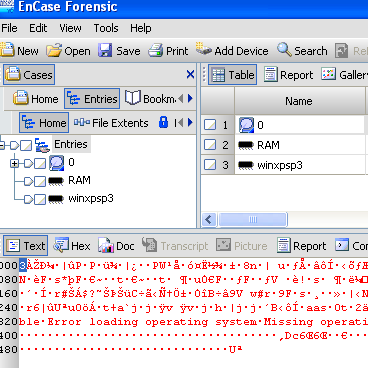
After you have pulled back all devices, you will see them in the pane on the left. Below you can see a disk image and two RAM samples, in this case one from a live machine and one acquired sample. You can, however, pull back several RAM and disk previews with EE. (I’m just giving you an example, since I don’t currently have EE with which to create nice screenshots).
Mounting Memory Using VFS
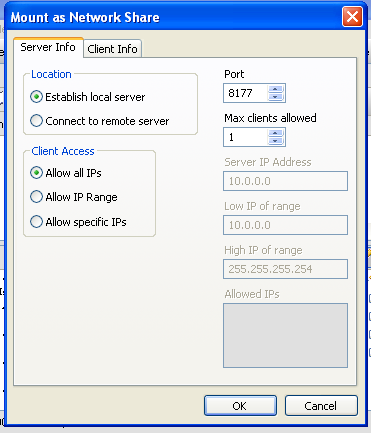
EE or EnCase Forensic (EF) with the VFS/PDE modules (or EF v7) all have the ability to mount disk and RAM in a way that can be accessed by the local machine. This is accomplished through EnCase’s Virtual File System (VFS) module. You can mount all RAM samples and disk images from live machines or evidence files as a network share. In order to do so, you have to mount at the case level and not one piece of evidence at a time. To do so, right-click on “Entries” in the left pane and choose “Mount as Network Share…” from the menu:

At this point, you will be presented with options for mounting the share. Pick the options most appropriate for you:
Once you hit “OK” you will see a message box that states where the evidence was mounted:

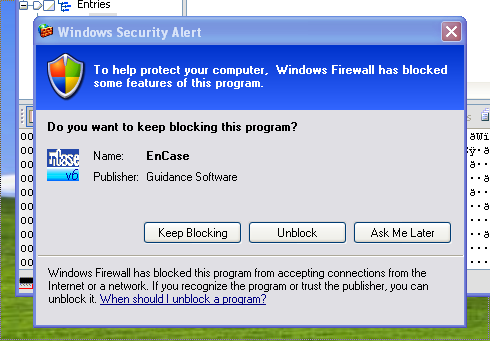
You may or may not receive a warning from Windows firewall, if so, allow EnCase access
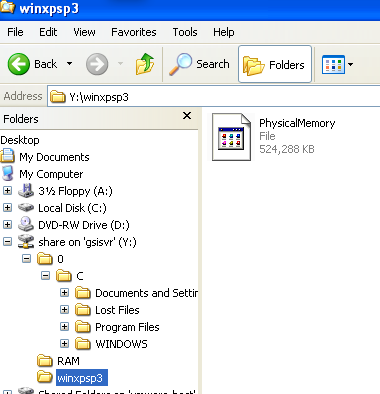
At this point you can explore to the share and process as desired. You can even share out and process with a linux machine if you so wish. If you have mounted several items, they will be contained inside their own separate folder. Disk
images will look as you would expect on a Windows system and RAM is exposed as a “file” called “PhysicalMemory”.
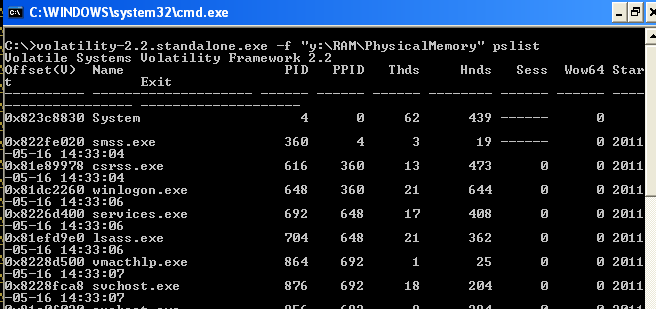
You can run Volatility over this exposed PhysicalMemory file as you would any other memory sample. This can be useful for triage or “sampling” of a machine without having to pull back the entire memory, which can be quite large. Plus you can script out Volatility to run over every memory sample that is mounted at once. The caveat of course is that you are interacting with the machine and therefore changing its state. You might overwrite evidence as you process the memory live. This is something that you have to consider in your IR plan and outside the scope of this tutorial.
To unmount, simply double-click “Virtual File System” in the bottom right-hand corner and choose “Yes” and “OK”.
I hope you have enjoyed this brief tutorial. If you have any questions, feel free to send me an email or find me on twitter (@gleeda).